This topic describes how to add historical cost data (“backfill”) into an existing AWS CUR.
Though AWS describes this process here, the following steps provide a fuller description.
Prerequisites
A CUR has been created
Access to the AWS Management account (formerly known as the Master Payer account)
To backfill data into a CUR:
From the AWS console, go to Billing and Cost Management.
Under Cost Organization click Cost Allocation Tags.
Click the AWS generated cost allocation tags tab.
In the search box, search for "aws:createdBy" (1).
If the status for that tag key shows “Inactive,” (2) select the checkbox by the tag (3) and then click Activate (4).
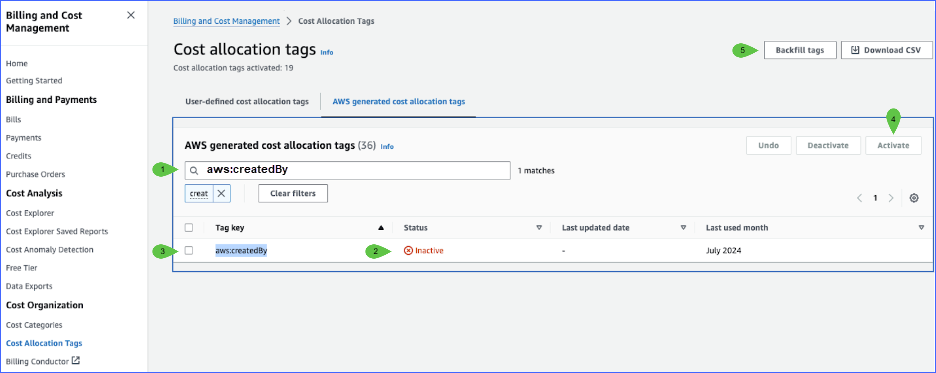
Click Backfill tags (5).
In the Backfill tags dialog, click the dropdown list and select the month to backfill from.
Best practice: Backfill 2 months of data starting from before you created the CUR. For Kompass, backfill 3 months of data.
Click Confirm.
This process can take up to 24 hours. To check the status, return to the same screen.
Once successful, notify the Zesty contact you are working with.
If you are unsuccessful, see the AWS troubleshooting for this topic: https://docs.aws.amazon.com/cur/latest/userguide/troubleshooting.html#backfill-data
You can also contact the AWS Billing Support team, as described here: https://docs.aws.amazon.com/cur/latest/userguide/billing-get-answers.html