This topic describes how to create a new Zesty Disk filesystem on a clean volume attached to a Linux instance.
After the completion of this operation, you have a new Zesty Disk mount point that will expand and shrink automatically.
Prerequisites
User access to the Zesty platform
Root user access to the instance with the created, empty volume
The Zesty Disk Agent is running on the instance
(Recommended) Before creating the first filesystem, verify AWS permissions, as described in zestyctl verification command - Verify Linux instance permissions.
To create a new Zesty Disk filesystem:
From the Zesty platform main menu, select Zesty Disk.
From the Managed Filesystems tab, click Install agent.
In the Install agent dialog, expand the Linux dropdown.
SSH or Putty into the prepared instance as a root user.
Copy the second command and run it on the instance:
zestyctl disk mount <device> <path>
For example, to create the/mnt/datamount point on the/dev/xvdbfilesystem, run:zestyctl disk mount /dev/xvdb /mnt/dataWhen the process is complete, a confirmation message is displayed:
Zesty Device mount completed
After the Agent reports back, you can see the new Zesty disk mount point in the Managed filesystems tab. You may have to click Reload:.png)
The new Zesty disk (A) has a capacity of 45 GB (B). Zesty took a 20 GB mount point and added an additional 25 GB mount point to enable expansion for user writes.
You can see the Zesty Disk earlier on the instance by running zestyctl disk list.
Output similar to the following is shown:
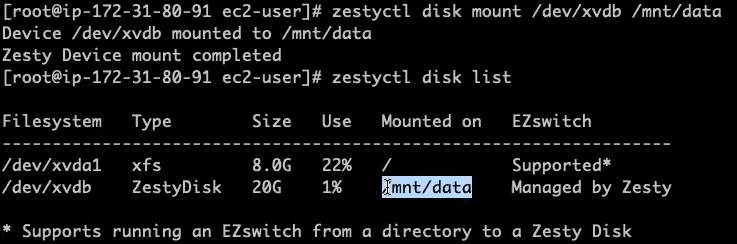
xvdb is a Zesty Disk.
(xvda1 is not a Zesty Disk. You can use Zesty EZswitch to migrate data to it and turn it into a Zesty Disk. For more information, see Migrate Existing Data to Zesty Disk.)
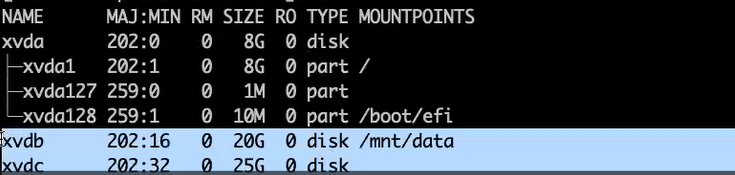
In the following figure, you can see the two mount points (xvdb and xvdc) that were created in the instance:
Congratulations!