This topic describes how to use the Zesty platform UI to onboard your AWS account with Zesty.
Onboarding connects your account so you can benefit from the Zesty platform features.
This topic is relevant for AWS Linked or Management accounts to use Zesty Commitment Manager, Kompass, and Zesty Disk.
You onboard an account using the Zesty platform Onboard account page:.png)
Onboard with Terraform for Kompass
You can also use Terraform to onboard a Linked AWS account for use with Kompass.
For more information, see Onboard an AWS Linked account for Kompass with Terraform.
Onboard an account when you need to:
Add a new organization to the Zesty platform.
Add an account to an existing organization on the Zesty platform.
During onboarding, you will be transferred to your AWS Management Console. There, you’ll use a CloudFormation stack to create an IAM role which then onboards your AWS account with Zesty.
Prerequisites
Access to the Zesty platform.
For more information, contact Customer Support.The AWS account to be onboarded has permissions to create IAM roles and CloudFormation stacks.
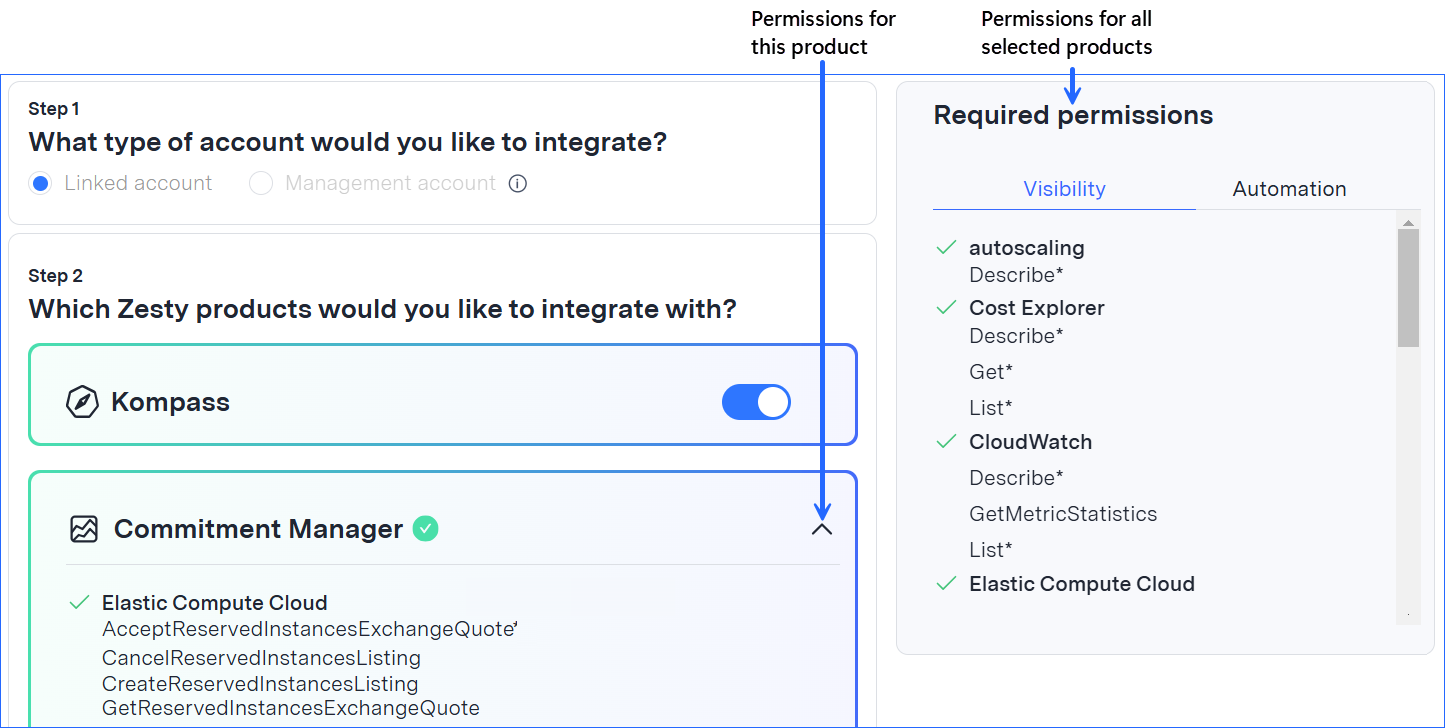
The required permissions are shown on the Onboard account page.
You are connected to the AWS account to be onboarded.
See the following table to determine which Zesty products require access to the CUR data:
Product
AWS account type
CUR
Commitment Manager
Management
Required
Zesty Disk
Linked
No CUR - Cost and savings are estimated based on AWS list price
Management
Optional - With a CUR, Zesty can show precise cost and savings
Kompass
Linked
No CUR - Cost and savings are estimated based on AWS list price
Management
Optional - With a CUR connected to Athena, Zesty can show precise cost and savings
If CUR access is being provided, the onboarding process will prompt you to enter the necessary values.
These are the requirement for CUR data:Zesty supports Legacy CUR and CUR v2.0, with a minimum of 24 hours of data.
To create a Zesty-compatible CUR, see Create an AWS CUR.Permissions to access the CUR and information about where it is stored (e.g., S3 bucket path).
When the CUR data is for Kompass, you need the following additional AWS prerequisites:
crawler-cfn.yml file is in the CUR S3 bucket.
Note: this file may not be present until up to 24 hours after first creating a CUR.AWS account ID.
Information about Athena resources (S3, Athena, Glue Data catalog). You can find these details in the AWS Console Athena section.
To onboard an account with Zesty using the Zesty platform:
Open the Onboard account page:
If you are already on the page, skip to #2.
From the Admin section of the Zesty platform main menu, select Organization Settings > Accounts.
The Accounts page displays existing accounts.
Click Add account.
The Onboard account page is displayed:
.png)
In Step 1, choose whether the AWS account is a Linked account or a Management account.
In Step 2, choose the products to activate.
In Step 3, configure the CloudFormation stack:
Note: You may not see all the fields described here. They will vary depending on the account type and product you chose in the previous steps and the CUR format that you choose here.Select the region where to create the stack that will be used for onboarding.
Enter the details of the CUR (for Management accounts):
(You can find these details in the AWS Console Billing and Cost Management section.)Select the format of your CUR: Legacy CUR, CUR 2.0, or None
Enter the CUR export name (for v2.0 only).
Enter the CUR S3 bucket.
Example: s3://zesty-cur/prod-v2
Enter the Athena details (required for Kompass).
You can find some of the following details in the AWS Console Athena tab.Region: Region where the source is located
Bucket name: the bucket where Athena query results are stored
Database: the name of the Athena database
Table: the Athena table name (in the Athena tab under your AWS database)
Account ID: ID of the AWS account
Workgroup: The Athena workgroup (in the Athena tab)
Catalog: The Athena data source (in the Athena tab)
In Step 4, create the IAM role:
Note: Before proceeding, ensure that you are logged into the account that you are onboarding.Review and approve the security content of the IAM role.
Click Create IAM role.
Zesty redirects you to the AWS Console to create a CloudFormation stack.In the AWS Console, scroll down to the Capabilities section and select I acknowledge that AWS CloudFormation might create IAM resources.
Click Create stack.
In the AWS console, the CloudFormation > Stacks page is displayed.
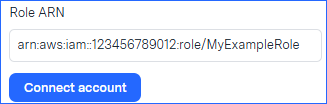
The Events tab shows the different events taking place. When the process is done, the CREATE_COMPLETE status is displayed.In the AWS Console Outputs tab, copy the full ZestyRoleArn value and paste it in the Role ARN field at the bottom of the Zesty Onboard account page.
For example:
Click Connect account.
Zesty takes a few moments to finalize the onboarding.
If you receive an error message or require other assistance, contact Customer Support.
From the AWS Management Console, add permissions (required for Kompass):
This process is explained in the AWS Edit IAM policies help topic.
Open IAM roles.
Click the recently created IAM.
In the Permissions policies section, click the policy name.
Add the following permissions so Zesty can access the result bucket:
        {
            "Sid": "ZestyCURBucketAccess",
            "Action": [
                "s3:Get*",
                "s3:List*"
            ],
            "Effect": "Allow",
            "Resource": "arn:aws:s3:::[CUR RESULTS BUCKET NAME]"
        },
        {
            "Sid": "ZestyCURBucketAccess",
            "Action": [
                "s3:Get*",
                "s3:List*"
            ],
            "Effect": "Allow",
            "Resource": "arn:aws:s3:::[CUR RESULTS BUCKET NAME]/*"
        },
Click Next.
On the Review and save page, review Permissions defined in this policy and then click Save changes.