This section describes how to apply an existing Auto Extend policy to one or more filesystems.
You can use the following methods to apply an existing Auto Extend policy to filesystems:
Apply a policy to a single filesystem
Use the Zesty platform.
These policies take effect and will be visible in the Zesty platform immediately.Apply a policy to multiple filesystems
Use the AWS console.
These policies take effect immediately, but can take up to 2 hours to be visible in the Zesty platform.
Apply a policy to a single filesystem
This section describes applying a policy to a single filesystem using the Zesty platform.
When you apply an Auto Extend policy to a filesystem from the Zesty platform, a tag is added to that filesystem to enable Auto Extend to know which filesystems to manage.
A tag is made of these parts:
Field | Value | Example |
|---|---|---|
Tag key | zesty:autoextend:policy_id | zesty:autoextend:policy_id |
Tag value | <policy ID> | a-bcdbcb5a9d |
To apply a policy to a single filesystem:
From the Zesty platform, select Zesty Disk.
In the Managed filesystems tab, filesystems that can be managed show the Select solution option.
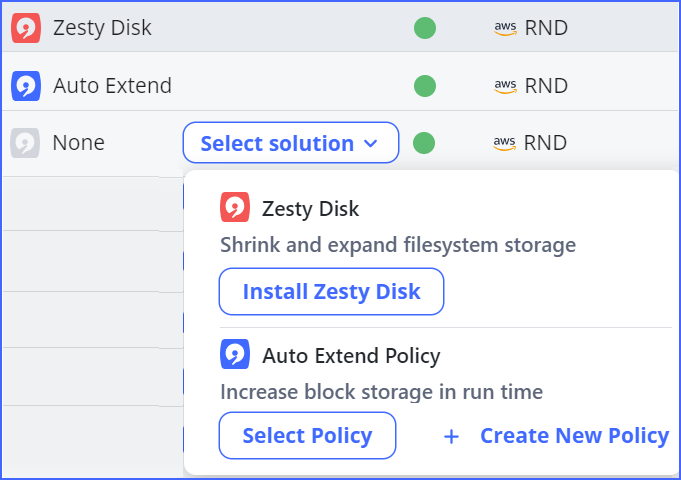
By the filesystem that you want to extend, click Select solution, then in the Auto Extend Policy section, click Select policy.
In the Select an Auto Extend Policy to File System dialog, locate a policy to apply.
You can change the sort order for the Policy name or Author columns.Find the policy to apply, click Apply Policy and then confirm.
The selected policy is applied to the filesystem.
Apply a policy to multiple filesystems
This section describes how to use the AWS console (or a script) to apply an Auto Extend policy to multiple filesystems.
To add a policy to multiple filesystems:
Use the AWS console or a script to add the Auto Extend tag key (“zesty:autoextend:policy_id”) and the tag value that is specific to that policy for each volume you want to set to Auto Extend.
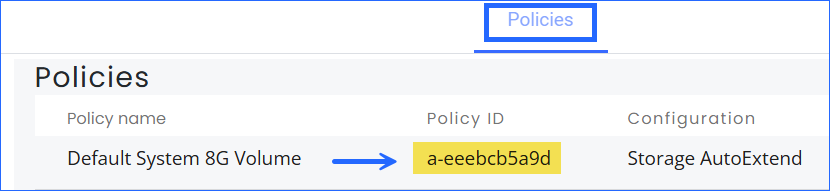
You can find the policy’s ID in the Zesty Disk > Policies tab: