This topic describes how to configure Zesty Disk as part of an AWS Auto Scaling Group (ASG).
The configuration modifies the launch template to create instances installed with the Zesty Disk Agent and an attached Zesty Disk.
Instances that you create must all comply with the System requirements.
Prerequisites
Access to the Zesty platform
For more information, contact Customer Support.Permissions to edit AWS launch templates
To modify an ASG launch template to be compatible with Zesty Disk:
From the Zesty platform, get the commands that will be entered into the launch template:
From the Zesty platform main menu, select Zesty Disk, then click Install Agent.
Select an operating system.
There are two commands displayed. The first installs the Agent and the second mounts a Zesty Disk.
You will copy these commands into the modified launch template.
From the AWS EC2 page, select Auto Scaling > Auto Scaling Groups.
Select an ASG.
In the Launch template section of the selected ASG, click Edit.
Select a version to edit then click Create a launch template version.
Modify the launch template:
(Optional) Enter a description.
In the Resource tags section, add a tag:
Key = ZestyDisk, Value = True, Resource types = Volumes (not Instances).(Recommended) In the Storage section, set the size of non-root volumes to an initial size of 50 GB (even if the application requires more).
As a Zesty Disk, the volume will expand as necessary.In the Advanced details section, in the User data section, add these commands:
Copy and paste the first command (install the Agent) from the Install Agent dialog (in step 1).
The command begins withcurl -sand ends with your unique API key.Copy and paste the second command (mount a new Zesty Disk filesystem) from the Install Agent dialog (in step 1).
zestyctl disk mount <device> <path>
This command mounts a new Zesty Disk filesystem.
Note: this command should replace any existing mount commands.
Click Create template version.
This new version now becomes the latest version.Select to use the latest launch template version:
Return to the Auto Scaling > Auto Scaling Groups.
Select the ASG.
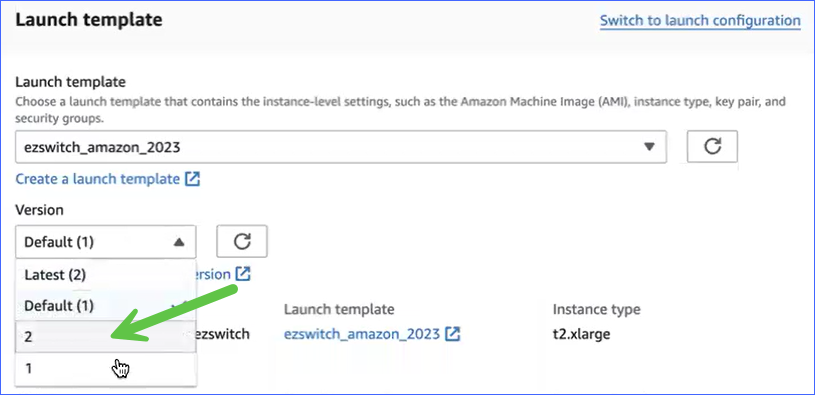
In the Launch template section of the selected ASG, click Edit.
For Version, select the latest version (in this example, 2) of the launch template:

New instances that will be created from this template are now compatible with Zesty Disk.