This topic describes how to automate the creation of crash-consistent backups for the EBS volumes in a Zesty Disk filesystem using AWS Backup. This ensures minimal risk of data loss during unexpected events.
The described steps ensure the proper backing up of Zesty Disk. Be sure to follow the described procedure, especially regarding all of the tagging requirements.
The topic also includes information on backup configurations, scheduling, and recovery options to help you optimize your backup strategy. For further details on this backup method, see Amazon EBS multi-volume, crash-consistent backups.
In the resource selection stage of the backup procedure, the setting described will direct AWS Backup to take a crash-consistent snapshot of all attached EBS volumes simultaneously. This means the snapshots will capture the volumes at the same point in time, preserving intervolume consistency.
After the backup configuration is described, there are recommendations for how to ensure application-consistency (if needed).
For restore options, see Restore backed up Zesty Disk volumes.
Prerequisites
IAM role to the AWS account where the instance is configured that enables creating and managing AWS backup.
To automate Zesty Disk backups using AWS Backup:
Log in to the AWS Management Console.
Open the AWS Backup tab.
You can search for AWS backup in the search bar.
Click Create backup plan.
From the options, select Build a new plan, then type an easily identifiable name (case sensitive, no spaces), such as ZestyDiskBackup.
Create a backup plan:
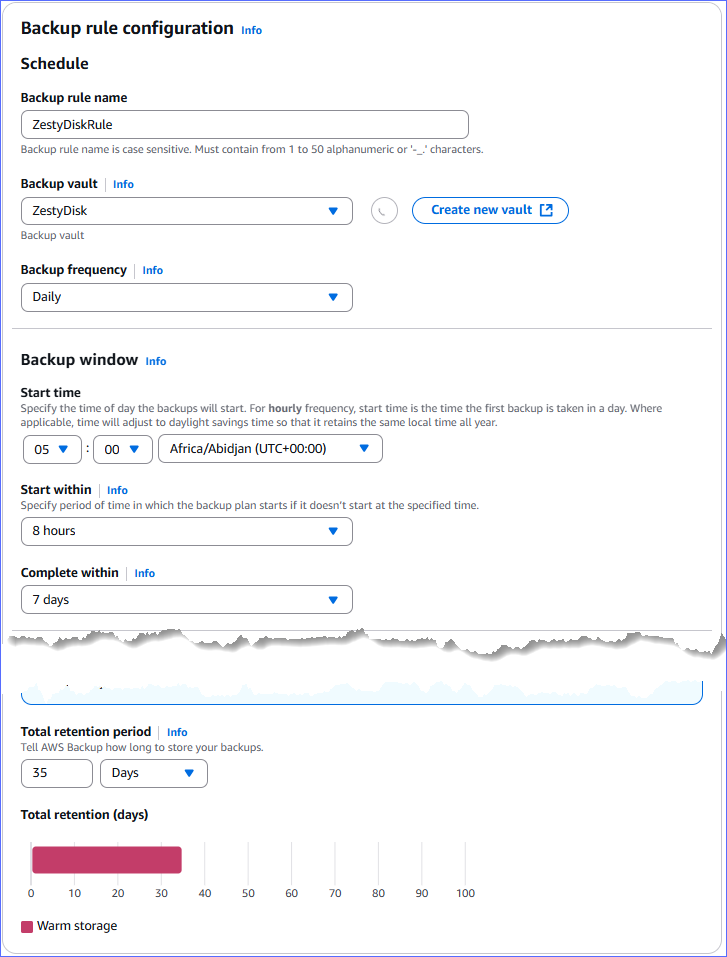
In the Schedule section, do the following:
Type a backup rule name.
Select a backup vault, or create a new one.
If you create a new vault, return to the backup tab.
Select the backup frequency.
In the Backup window section, set the start times and complete within time.
In the Lifecycle section, set how many days to retain the backups.
In the following example, we created a new snapshot of each instance every 24 hours at 05:00 UTC, with a retention period of 35 days:

Click Create plan.
The plan is created.
In the Assign resources page, select resources for the new backup plan:
In the General section, type a name for the resource assignment, and select an IAM role to be used by this backup plan.
Ensure that the selected IAM has permissions to take snapshots of the instance and attached volumes.
In the Resource selection section, define which resources to back up:
Click Include specific resource types and in Step 2, select EC2.
This directs AWS to backup all EBS volumes attached to the instance.
(You can instead specify the instance IDs to back up.)
AWS Backup will automatically detect and include all volumes attached to those instances.
These settings ensure that AWS Backup takes a crash-consistent snapshot of all attached EBS volumes simultaneously; the snapshots will capture the volumes at the same point in time, preserving inter-volume consistency.
In Step 4, add an instance tag identifier so AWS Backup can identify the instances to back up.
Click Assign resources.
Volumes that match the specified tags will be backed up automatically in accordance with this policy.
AWS Backup will ensure all volumes are in sync at the snapshot time but it doesn't pause applications or ensure data in memory is included in the snapshots. To ensure application consistency (if needed), follow up with an additional method such as pausing applications, using the AWS System Manager, or other application-specific backup methods.